
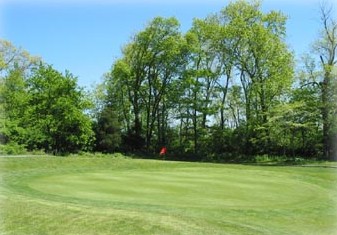
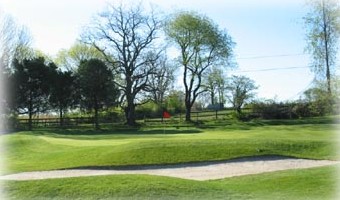
Start your round with a short uphill par four. Take aim down the left side of the fairway to avoid the large tree on the right. A blind shot into the green is the first of many on this course, but this opening hole provides a great chance to open with a solid score.
| blue | 251 |
| white | 233 |
| red | 226 |
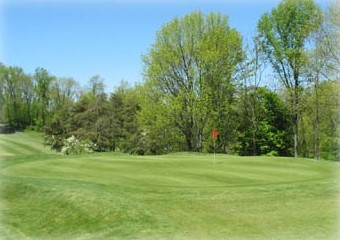
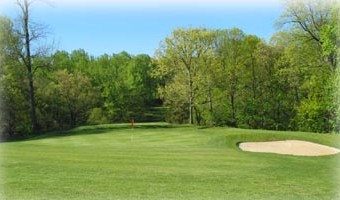
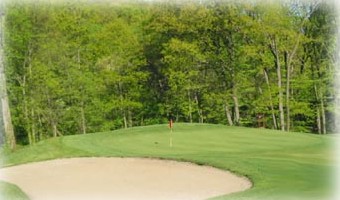
The first par three is a tough, downhill challenge. A small green that runs left to right is surrounded by a large bunker, numerous trees, and the clubhouse itself. Stick your tee shot close for a chance at birdie.
| blue | 198 |
| white | 177 |
| red | 167 |
Hole 3 is a straight uphill par four that is best played down the left side to take the large tree on the right side out of play. Consider taking an extra club for your blind approach into a green that runs back to front and has little room behind for error.
| blue | 338 |
| white | 325 |
| red | 258 |
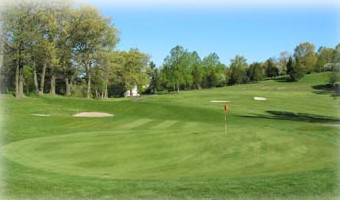
An elevated tee requires a precise first shot on this hole that doglegs left. The smart play is a long iron or utility wood to the right side of the lower fairway. A large, flat green is surrounded by a bunker to the left and collection area to the right.
| blue | 326 |
| white | 312 |
| red | 296 |
The toughest hole on the course. What appears to be a straightforward par four requires a tee shot down the left side, leaving a mid iron for a blind second shot. The undulating, crowned green falls off severely on three sides. Par is a great score here.
| blue | 390 |
| white | 378 |
| red | 283 |
An uphill, dogleg right awaits you on the sixth hole. Aim your tee shot to the left side of the fairway and beware of a green that is guarded by two back bunkers and slopes severely left to right. Keep your approach below the pin to give the best chance at a good score.
| blue | 359 |
| white | 305 |
| red | 259 |
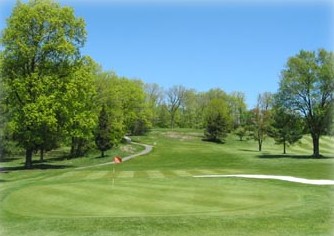
A downhill and true “risk-reward” par four. Skilled players can take aim at the two-tiered green on their tee shot, but beware of the two bunkers guarding the front of the green. Your second shot must be below the hole and on the same tier as the pin or else a seemingly easy hole can unravel quickly.
| blue | 277 |
| white | 264 |
| red | 257 |

This straight uphill par four can be played two ways: lay up in the fairway at the bottom of the hill for a flat mid-iron approach or go for distance to leave just a short chip in. In either case, a blind second shot leads into a two-tiered green with little room for error behind
| blue | 315 |
| white | 307 |
| red | 300 |
The first of three par fives, Hole 9 is reachable in two by only the longest hitters. The large, flat green is guarded by two bunkers and there is little room for error behind. Played properly, this hole gives a great chance at a birdie to close out the front nine.
| blue | 553 |
| white | 528 |
| red | 466 |
Hole 10 starts the back nine off with a downhill par three. The blue tees play across a ravine while the red and white tees play a short iron from an elevated tee box. Be mindful of a green that has a bunker to the right and limited space behind it.
| blue | 155 |
| white | 126 |
| red | 113 |

Hole 11 starts a unique run of four holes on the west side of the course. As a shorter dogleg right, this tee shot presents a gamble: the more you aim to cut the corner, the more the landing area slopes and thick trees come into play. Par is a good score here.
| blue | 297 |
| white | 294 |
| red | 276 |

Longer hitters have a great chance at reaching the green under regulation on this par five. For the best chance at a low score, clear the two bunkers that guard the front side of the green on your approach, but be mindful to keep your ball below the hole- this two-tiered green holds one of the most severe slopes on the course.
| blue | 403 |
| white | 363 |
| red | 318 |
This long par three is the toughest on the course and is lined by obstacles on the right: trees, a road, and a greenside bunker all can find their way into play. The green itself also slopes right to left, making it crucial to aim for the left-center portion on your approach.
| blue | 191 |
| white | 176 |
| red | 165 |
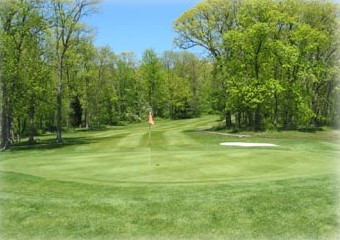
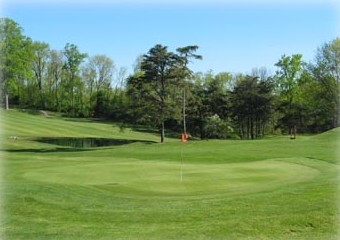
The Manor Golf Club’s signature hole is a three-shot par five. Take your drive down the left-center fairway and follow up with a short to mid iron to a downhill landing area. To score well, the approach into the green must avoid trees on both sides and a bunker on the right.
| blue | 542 |
| white | 525 |
| red | 475 |
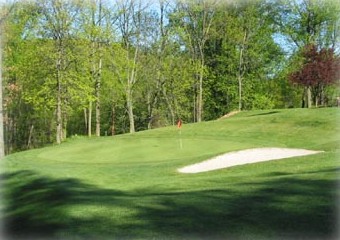
The shortest hole on the course. For the best chance at a low score, avoid the greenside bunker on the right and carry enough club as being short can turn even a par save into quite the challenge.
| blue | 90 |
| white | 75 |
| red | 75 |
A shorter par four that is home to a large tree in the center of the fairway and a tight out of bounds lining the right side. The small, undulating green is guarded by a mixture of grass mounds and a sand trap with little room for error behind.
| blue | 283 |
| white | 274 |
| red | 274 |
Hole 17 is another straightaway par four, with a fairway that slopes left to right and runs downhill approaching the green. A precise approach shot is necessary as the green falls off severely on three sides and can create a big number on the scorecard.
| blue | 329 |
| white | 318 |
| red | 318 |
The finishing hole is an uphill par three that crosses a ravine and requires a club up. Surrounded by bunkers on two sides and falling off to the right, the 18th green slopes massively back to front and is also split into two tiers. Keep the ball below the pin for the best chance to close your round with a birdie.
| blue | 160 |
| white | 140 |
| red | 115 |